【osmdroid】Android でマップを表示する(Java)
はじめに
地図を使った Android アプリを開発するとき、真っ先に浮かぶのが Google Maps です。しかし Google Maps は従量課金制となっており、アクセス数が多くなるほど課金が必要になっています。
そこで、Google Maps の代替手段となるのが osmdroid です。osmdroid は Android 上で OpenStreetMap を使えるようにしたライブラリで、基本的には無償で使用することができます。というのも、この OpenStreetMap が「誰でも自由に地図を編集して、誰でも自由に地図を利用使えるように」という世界的プロジェクトで、いわば地図界のWikipediaにあたるような存在です。各個人が GPS などでデータを集めていき、共有することで、非常に詳細なマップのデータベースを作り上げています。もちろん、無限に OpenStreetMap のサーバーにアクセスしていい訳では無いのですが、例えば OpenStreetMap のマップデータをレンタルサーバーに保存しておき(複製可)、そのサーバーに osmdroid でアクセスするようにすれば、特に利用料を気にせずに Android アプリを開発することが出来ます。
今回はそんな osmdroid について、導入方法を説明したいと思います。
osmdroid の導入方法
導入方法ですが、まず Android Studio で「File」→「New」→「New Project」で、新しい Empty Activity を作成します。この例では、プロジェクト名を「TrekkingTrail」としました。
次に、build.gradle (:app) に、下記を追記します。
dependencies {
    ...
    implementation 'org.osmdroid:osmdroid-android:6.1.13' // この行を追加
    ...
}
追記後、「Sync Now」を実行します。
同期が終了したら、AndroidManifest.xml に、permission を追加します。
<uses-permission android:name="android.permission.INTERNET" />
<uses-permission android:name="android.permission.ACCESS_NETWORK_STATE" />
permission 追加後の AndroidManifest.xml は以下のようになります。
<?xml version="1.0" encoding="utf-8"?>
<manifest xmlns:android="http://schemas.android.com/apk/res/android"
    xmlns:tools="http://schemas.android.com/tools">

    <uses-permission android:name="android.permission.INTERNET" />
    <uses-permission android:name="android.permission.ACCESS_NETWORK_STATE" />

    <application
        android:allowBackup="true"
        android:dataExtractionRules="@xml/data_extraction_rules"
        android:fullBackupContent="@xml/backup_rules"
        android:icon="@mipmap/ic_launcher"
        android:label="@string/app_name"
        android:supportsRtl="true"
        android:theme="@style/Theme.TrekkingTrail"
        tools:targetApi="31">
        <activity
            android:name=".MainActivity"
            android:exported="true">
            <intent-filter>
                <action android:name="android.intent.action.MAIN" />
                <category android:name="android.intent.category.LAUNCHER" />
            </intent-filter>
        </activity>
    </application>
</manifest>
これで、osmdroid を使う準備が完了です。
activity_main.xml に MapView を追加します。
<org.osmdroid.views.MapView
    android:id="@+id/mapView"
    android:layout_width="match_parent"
    android:layout_height="match_parent"/>
画面いっぱいにマップを表示する場合、activity_main.xml の例は以下のようになります。
<?xml version="1.0" encoding="utf-8"?>
<androidx.constraintlayout.widget.ConstraintLayout xmlns:android="http://schemas.android.com/apk/res/android"
    xmlns:app="http://schemas.android.com/apk/res-auto"
    xmlns:tools="http://schemas.android.com/tools"
    android:layout_width="match_parent"
    android:layout_height="match_parent"
    tools:context=".MainActivity">

    <org.osmdroid.views.MapView
        android:id="@+id/mapView"
        android:layout_width="match_parent"
        android:layout_height="match_parent"
        app:layout_constraintStart_toStartOf="parent"
        app:layout_constraintTop_toTopOf="parent" />

</androidx.constraintlayout.widget.ConstraintLayout>
最後に、MainActivity.java に以下のように記載します。
package com.example.trekkingtrail;

import androidx.appcompat.app.AppCompatActivity;
import android.os.Bundle;
import android.preference.PreferenceManager;
import org.osmdroid.config.Configuration;
import org.osmdroid.views.MapView;

public class MainActivity extends AppCompatActivity {

    @Override
    protected void onCreate(Bundle savedInstanceState) {
        super.onCreate(savedInstanceState);
        Configuration.getInstance().load(getApplicationContext(),
                PreferenceManager.getDefaultSharedPreferences(getApplicationContext())); // 追記(setContentView より前に置く)
        setContentView(R.layout.activity_main);
    }
}
アプリをダウンロードすると、マップが表示されることが確認できます。

マップの初期設定をする
以上のようにマップを表示することは出来ましたが、ズームレベルの初期値が0になっているため、小さな世界地図が表示されています。そこで、初期値の中心座標とズームレベルを設定します。
MainActivity.java に以下のように追記します。
public class MainActivity extends AppCompatActivity {
@Override
protected void onCreate(Bundle savedInstanceState) {
super.onCreate(savedInstanceState);
Configuration.getInstance().load(getApplicationContext(),
PreferenceManager.getDefaultSharedPreferences(getApplicationContext()));
setContentView(R.layout.activity_main);
MapView mapView = (MapView) findViewById(R.id.mapView);
IMapController mapController = mapView.getController();
mapController.setZoom( 6.0 ); // ズームレベルの設定
GeoPoint centerPoint = new GeoPoint( 38.00, 138.00 );
mapController.setCenter(centerPoint); // 中心座標の設定
mapView.setMultiTouchControls(true); // タップでズームの追加
mapView.setHorizontalMapRepetitionEnabled(true); // 地球一周してもマーカー等のオブジェクトを繰り返す
mapView.setVerticalMapRepetitionEnabled(false); // 南北方向に一周した場合はオブジェクトを繰り返さない
mapView.setScrollableAreaLimitLatitude(MapView.getTileSystem().getMaxLatitude(),
MapView.getTileSystem().getMinLatitude(), 0); // 南北方向のスクロール範囲を北極から南極までに制限する
mapView.setMinZoomLevel(3.0); // 最小ズームレベルを3に設定する
}
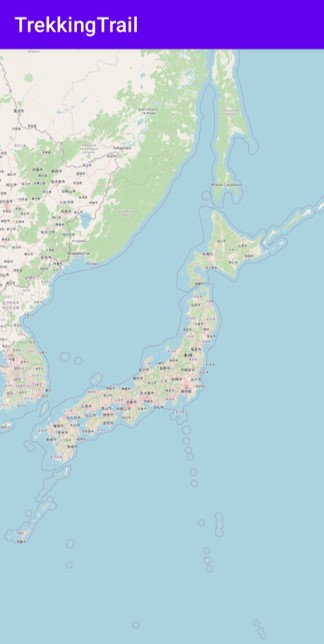
}初期値の中心座標とズームレベルが設定されたのが確認できました。
デモアプリ
当サイトでは、osmdroid を用いた GPS ロガーのデモアプリを公開しています。使い方はこちら。下記のボタン、あるいはQRコードよりダウンロードできます。このアプリは Android4.1 から Android13 までに対応しています。

備考:デモアプリの Google Play での公開はめんどくさすぎて心が折れました。
なお、デモアプリ上で使用しているマップデータは当サイトのサーバーに保存しているため、サーバースペックにより低解像度の地図となっています。高解像度な地図をご所望の方は、こちらにソースコードを公開しているので、Android Studio でアプリを作成して、OpenStreetMap にアクセスしてください。
機種によってはバッテリー消費を抑える為、アプリが強制停止されることがあります。その場合は、バッテリー設定より、バックグラウンドでの動作を常に許可してください。
→ プライバシーポリシー